Spartify.io Customer Onboarding Guide
Welcome to Spartify.io – Follow this quick 7-step guide to get started in just 15 minutes. At the end of this guide, you will find a tutorial video to assist you through the setup process.
Set Up Your Profile
Begin by creating your Spartify.io account
-
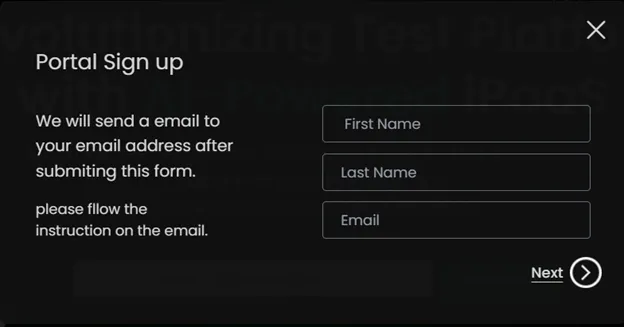
Visit the Spartify.io website and click on “GET STARTED”.

-
Fill in your basic details and click “Next”.
-
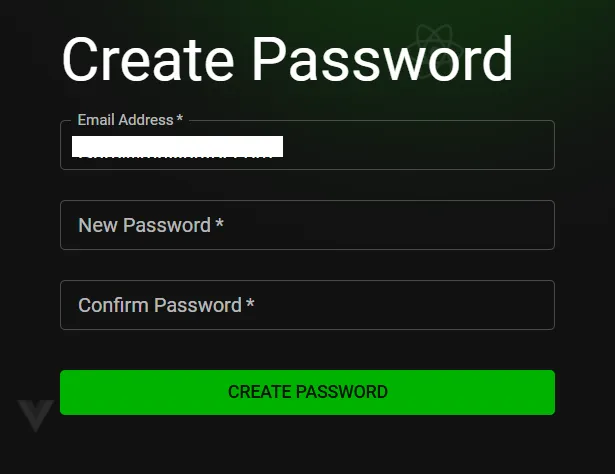
Follow the Email sent to you by the Spartify team and Access the developer portal.

-
Reset your authentication for secure access (Change your password before proceeding with dev portal).
Activate Your Account
After setting up your profile, proceed with activation
-
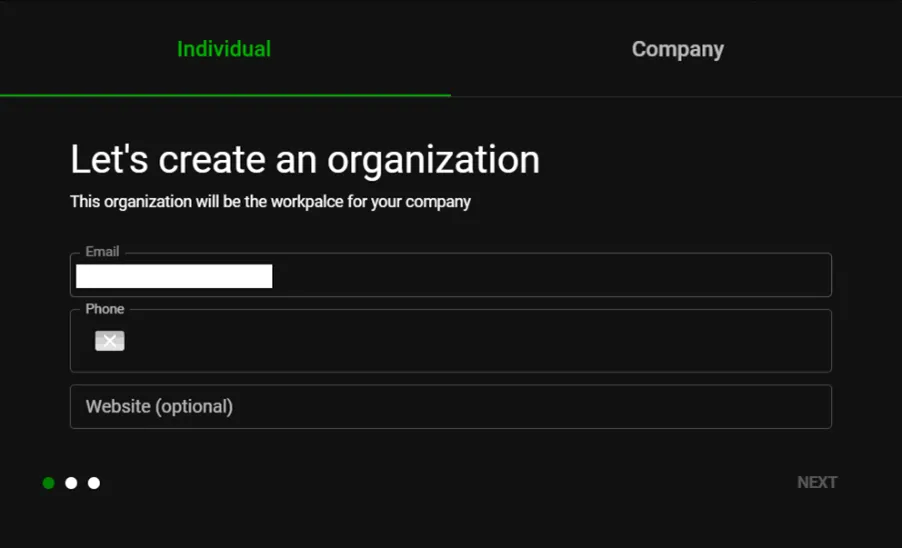
Set up your organization profile.
-
Customize your individual profile settings to match your testing needs.
-
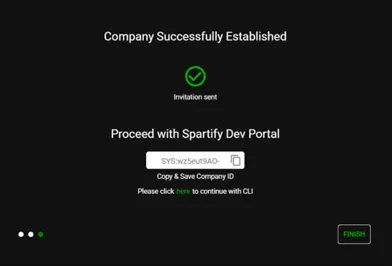
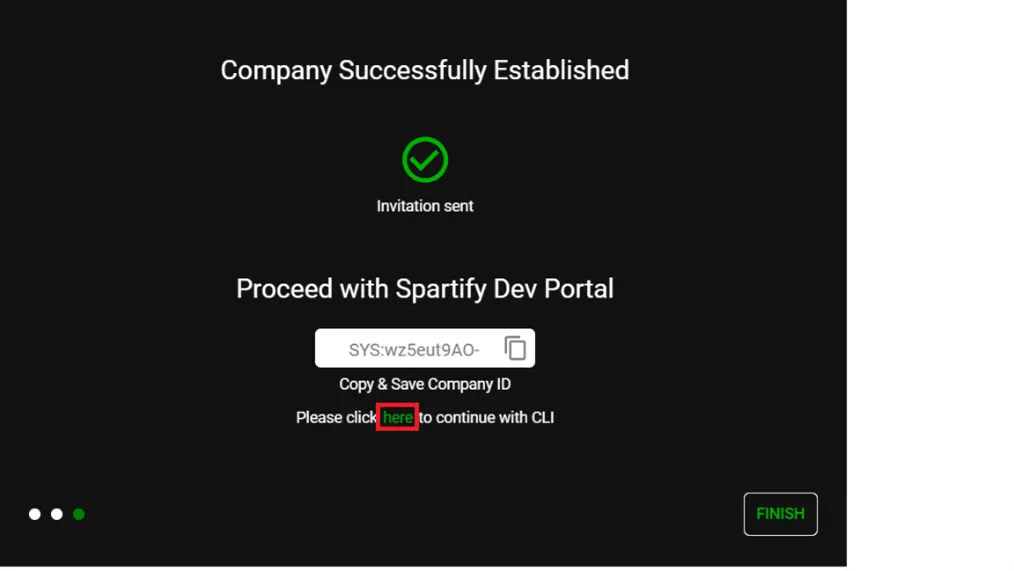
Obtain the release partner account key (Store this securely as your recovery key).
Create a Test Project Instance
Start your first project setup
-
Navigate to the NPM Package page to Build your first test project.
-
Create your project folder on your local machine.
-
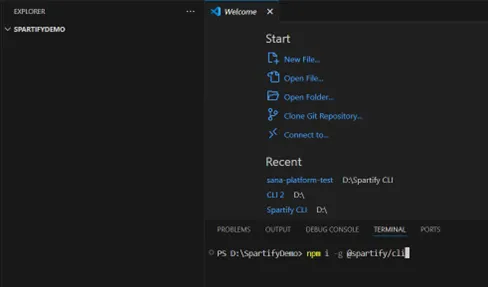
Open the Terminal on the created folder

-
Follow the guide on the NPM page (Type “npm i -g @spartify/cli”)
-
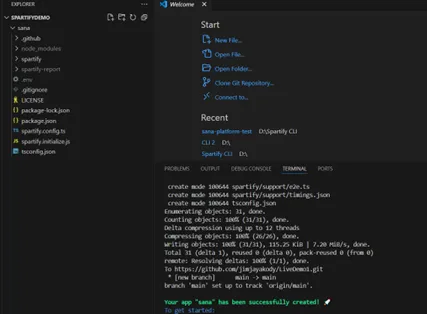
Connect it with Spartify middleware.
-
Populate team and project data accordingly from your local.
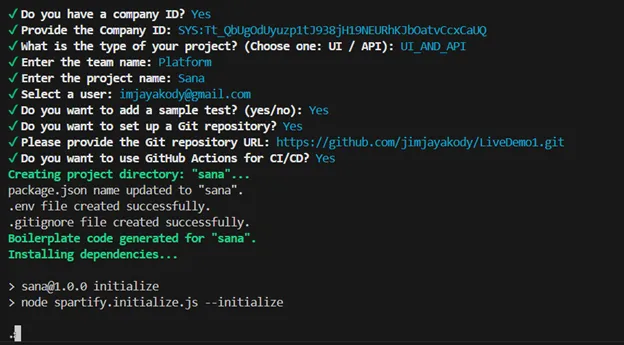
Initiate the Framework with the Spartify Agent
The Spartify Agent will facilitate a seamless initial setup
-
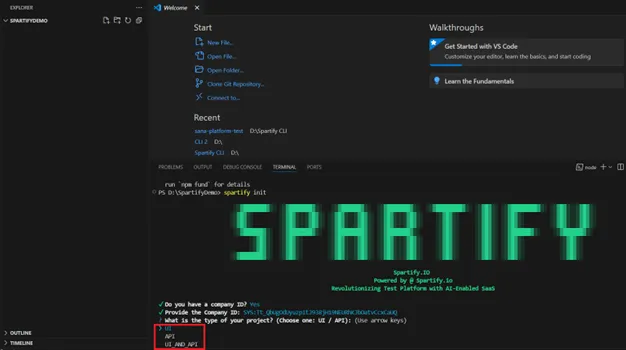
Insert the company ID provided by the Spotify team.
-
Select the project type you want.
-
Enter the team name, Project Name, and user.
-
Select the option with sample test yes.
-
Enter the Git repository url and select GitHub Action for CI/CD as yes[If you want you can skip this for later GIT integrations]

Start Writing Your Scripts
Leverage Spartify’s boilerplate templates
-
Go to Id and check the project for Use the auto-generated boilerplate to maintain test governance.
-
Follow structured governance to write effective and efficient tests.
-
Develop your first test case using best practices.
Deploy Your Code and Test
Prepare for execution by ensuring integration readiness
-
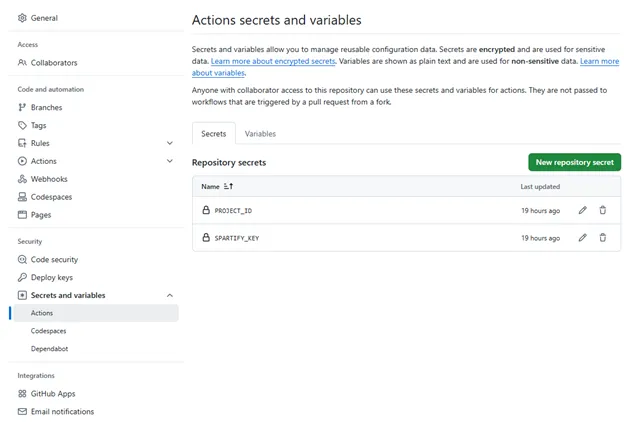
Enable GitHub integration from the Spartify middleware.
-
Alternatively, manually configure the required GitHub token in your organization’s GitHub account [SPARTIFY_KEY | PROJECT_ID].
-
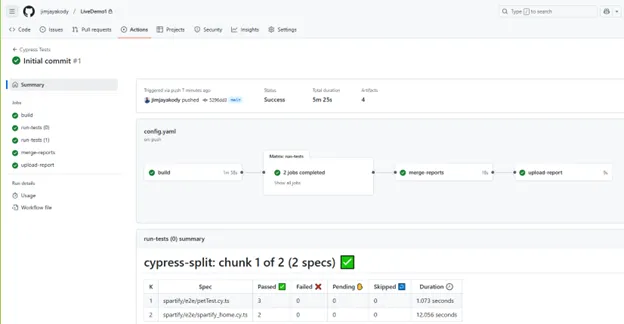
Push your test scripts to execute them.
View Results in the Dashboard
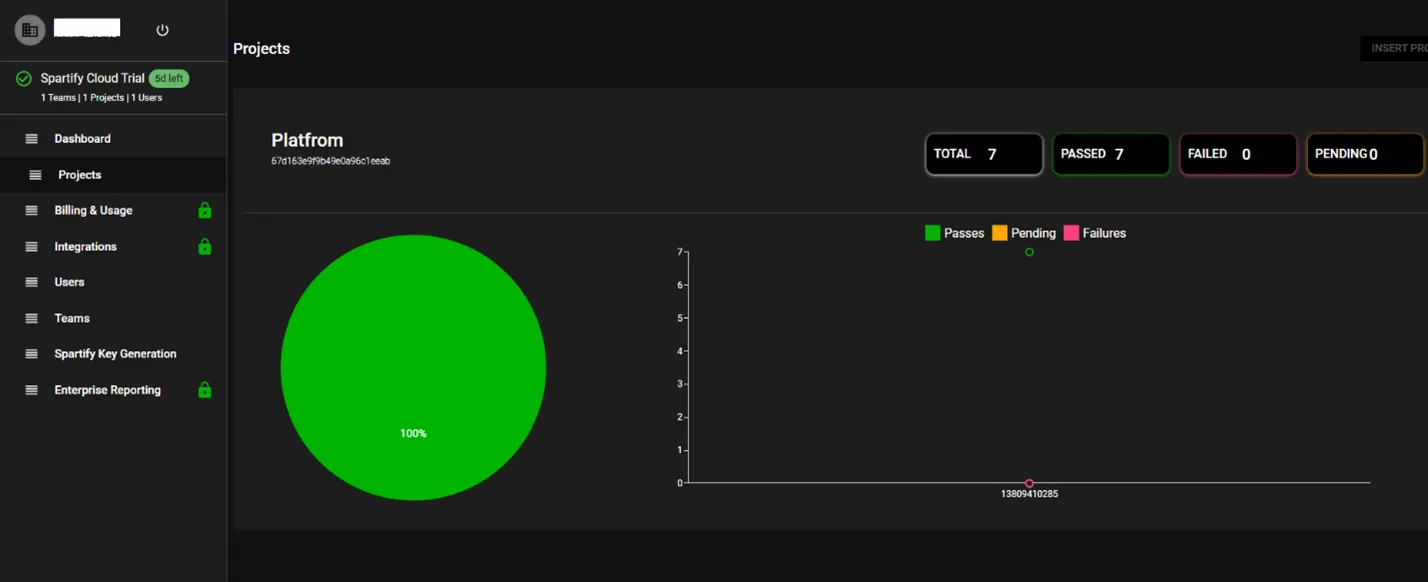
Once tests are executed, view the results in the Spartify portal
-
Execution will be triggered as per the default mode after your initial commit.
-
Spartify enables parallel execution for optimized performance.
-
Results will be published under Spartify -> Project level.
Next Steps
Congratulations! 🎉 You’ve successfully onboarded to Spartify.io. Now, explore more advanced features, optimize your testing workflow, and collaborate with your team efficiently.
📌 Watch the tutorial video below for a detailed walkthrough of the setup and execution process.